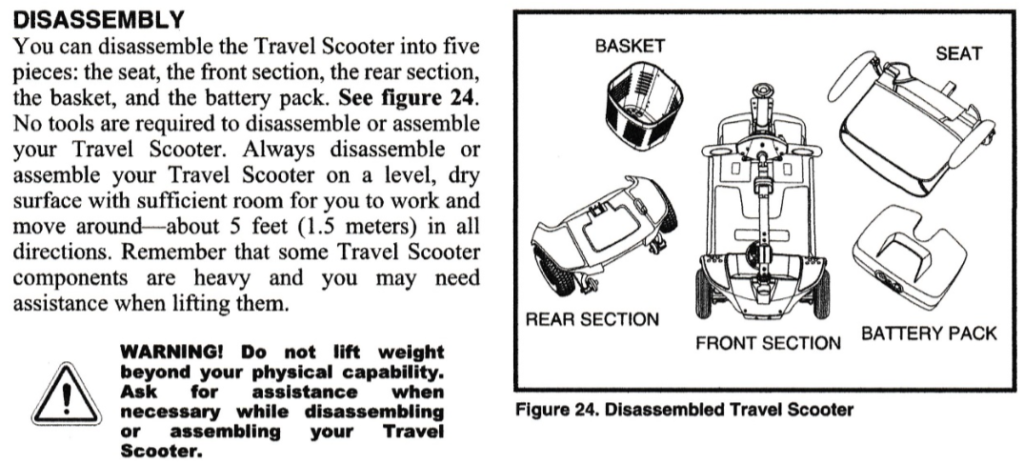
Scooter Disassembly
To begin, carefully remove the seat by lifting it straight up and off the scooter. Make sure to grip the seat firmly, but not too tightly, to avoid any undue strain. If you encounter any resistance during this process, pause and check that you have fully disengaged the seat rotation lever first, as not doing so can cause unnecessary stress on the components. Then, gently swivel the seat back and forth while simultaneously lifting it to help ease it off. This rocking motion can help free any parts that may be stuck, making the removal smoother.
Next, locate the battery pack, which is typically situated beneath the seat or at the rear of the scooter. Carefully grasp the battery pack by its handle or designated area and slowly remove it from the scooter. It’s important to handle the battery with care to avoid any damage or disruption to the scooter’s power system. Always ensure that you are lifting the battery straight out to prevent any bending or crimping of the connectors.
After removing the battery, lower the tiller by adjusting it to a comfortable position. This adjustment is important for ensuring that you can operate the scooter effectively. Be sure to tighten the adjustment knob securely to keep it in place, as a loose tiller could lead to instability while driving.
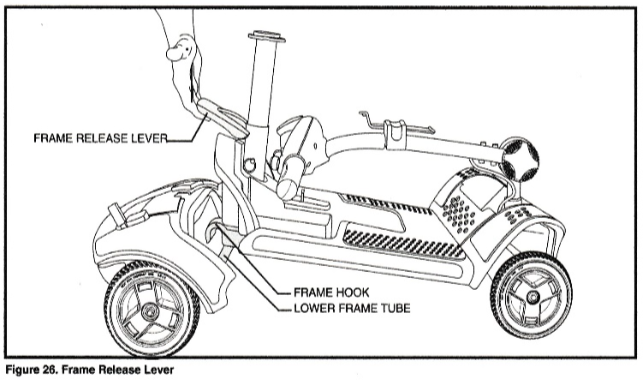
Then, lift the frame release lever with a steady motion until the frame hooks are no longer resting on the lower frame tube. Ensure that you maintain a firm grip on the lever, as it offers resistance. This step is crucial for ensuring that the frame can be separated without any hindrance, allowing you to proceed without complications.
Finally, slowly and carefully separate the two sections of the scooter, making sure to do this gently to avoid any potential damage to the connecting components. Take your time during this process; rushing can lead to mistakes or damage. Once the sections are apart, inspect both parts for any signs of wear or damage to ensure optimal performance when reassembling.